

Click Here for printable diagram
Click here for printable version

Installation Notes
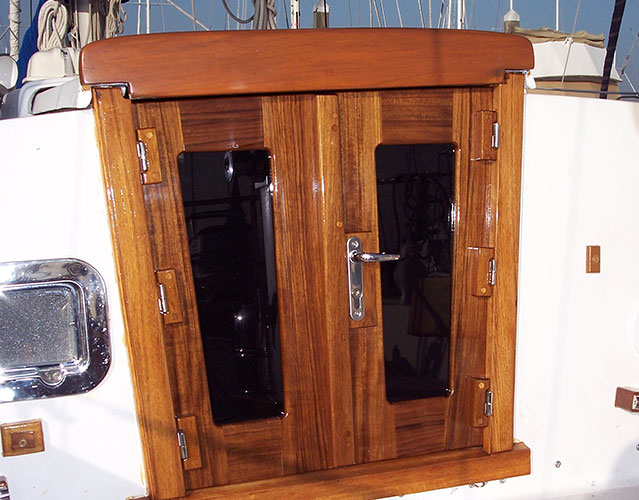
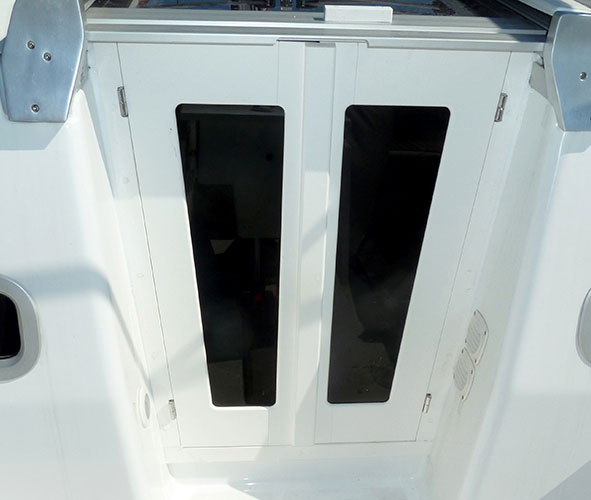
Doors without screens:
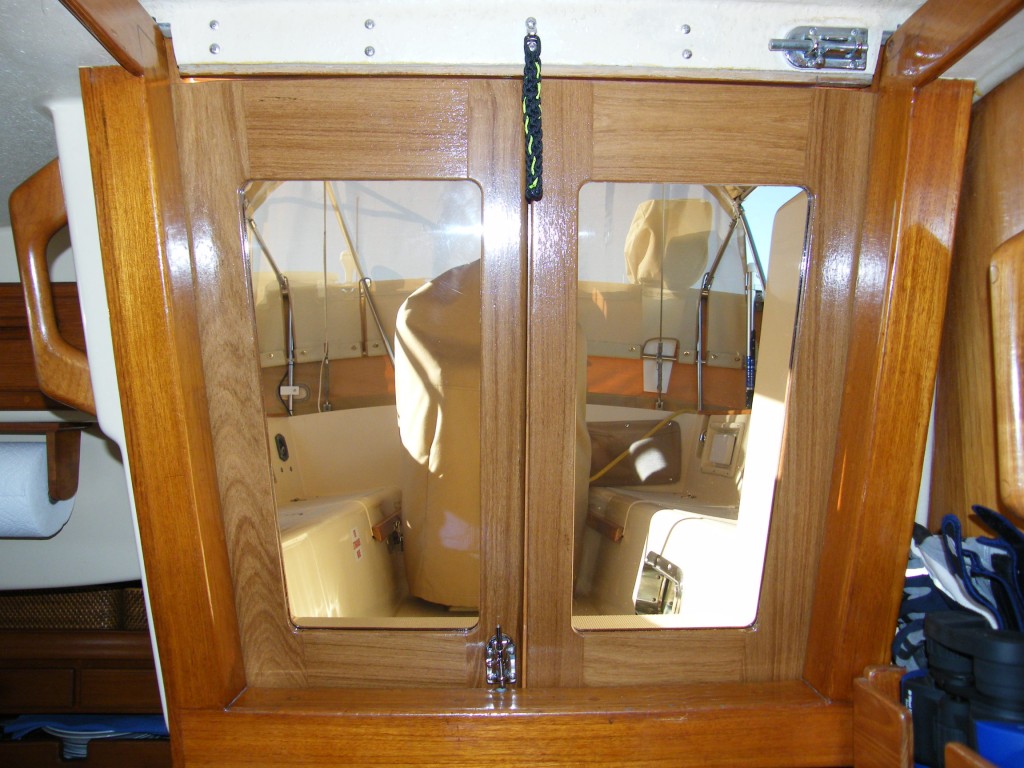
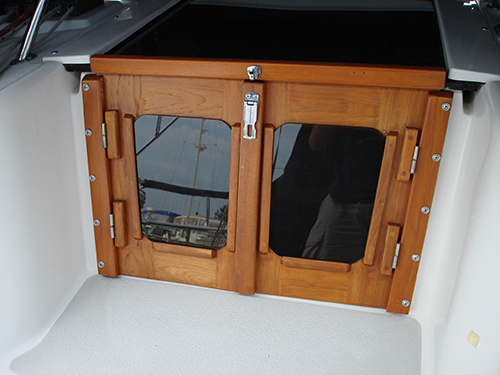
Install the doors with the teak weather seal in the center of the doors facing aft. The large 3/4″ radius on the port and starboard edges of the door faces forward.
TO INSTALL FACIAS (If you already have teak facias, skip to #2):
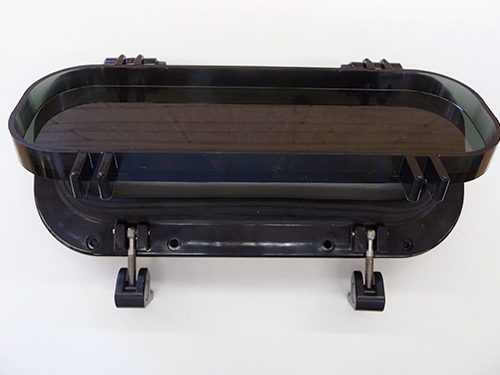
1a. For boats that require the doors to be added aft of the hatchboard groove due to a metal channel in the companionway, an optional facia kit has been supplied to create the new “groove” that the doors will rotate into. Position the facias to leave a gap of 1/8″ MORE THAN the thickness of the doors. Mitre cuts at the top and bottom of the facias are already done to match the doors and determine the left and right configuration; a bevel at top of facias may be necessary to close slider 1b. For boats with metal facias, a teak facia kit has been supplied to replace metal facias. Check layout by placing teak facias against metal facias before removal to determine best position. Remove metal facias and use as a drill template on new teak facias. Drill 3/8 counter bore first with a Brad point drill to 3/8″ deep. Then drill 7/32 through the facia and mount. Fill with teak plugs provided.
2. Place doors in the groove created by the facias (for those not installing facias, this will be the existing hatchboard groove). Position the doors equidistant and flush at the bottom. Leave 1/32″ -1/8″ gap between doors with shim material. Clamping the two halves together will eliminate the need for an extra set of hands. Slide the top closed and check for squareness of the companionway frame. Corrections of about 1/8″ may be required, use a long block of wood with 60-80 grit sandpaper. Maintain the 1/8″ radius afterwards by sanding with 80 grit, then 120.
3. If varnishing, wedge material behind door to leave about a 1/32″ gap between new door and teak facia to allow for varnish buildup. Position hinge blocks against the door one to three inches from the top and bottom. With a pencil, mark corners of hinges laying against the teak facias. Remove half-hinge from block and reposition within pencil marks. Drill 7/64″ x 3/4″ deep and mount to facias. Assemble hinges and test position of block against door to be near flush. The last step is to mount the blocks to the door. Drill through blocks to leave center points in the door, then drill door to 5/8″ deep. Drive in the #6 x 1″ pan head screws until block is flush with doors. Test for ease of operation. Binding points on each side of the door will need to be sanded or planed to fit. In some cases as much as 1/8″ material thickness may need to be removed.
FINISHING
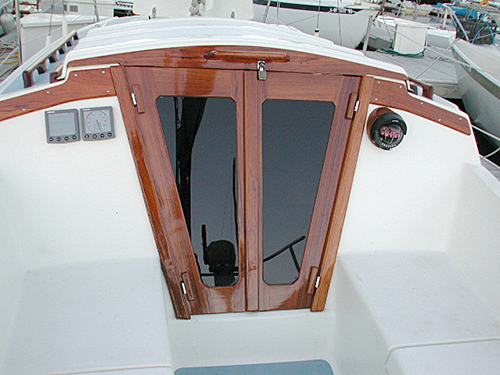
1. The hasp for the lock may now be mounted. Either line up with the original pad eye of the original hasp or move the hasp on your original hatchboards to the new location on the doors so that one pad eye will accomodate both hasps.
2. The clear bumper pads are added to prevent doors from hitting the corners on the cockpit seats.
3. For doors without screens: windows can be inserted after bright work is completed by removing the screws from the inside stiles with the furnished #2 square drive and removing stile. Remove paper and slide windows in, making sure you align pieces carefully and have cleaned joint surfaces. Screw back together until the wood seam disappears.
ALL PRODUCTS: Maintain with teak oil or varnish. Cover where and when appropriate.
Cleaning Acrylic
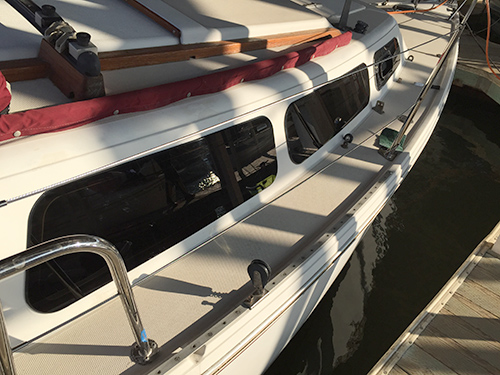
Cleaning suggestions for Retrofit Windows and Retrofit Hatches
Wash with a mild soap or detergent and lukewarm water. Use a clean soft cloth or sponge chamois.
Never use abrasive cleaners, household cleaners, window cleaning fluids, scouring compounds, gritty cloths, or strong solvents such as alcohol, acetone, carbon tetrachloride, etc.
To maintain the brilliant luster of acrylic, wax occasionally with a good grade of automobile paste wax or “tree-wax” but NOT a cleaner-wax combination. If you find a product you want to try, just make sure they specifically indicate for use on acrylic.
Never use household spray waxes!


